Pokornyi Engineering is now a fairly well-known name within the sim racing community. The Hungarian manufacturer of do-it-yourself (DIY) sim racing projects now has a wide range of fantastic DIY kits. Pokornyi Engineering has now established itself as a renowned manufacturer of high-quality DIY kits in the industry. In addition to the previously made Pokornyi Engineering HYP-R I recently had the opportunity to build another popular product: the Pokornyi Engineering Rally Button Box. In this article, I will take you step by step and show you exactly how I built this Rally Button Box!

Pokornyi Engineering Rally Button Box
It is no secret that the Pokornyi Engineering Rally Button Box inspired by the Fanatec Podium Button Module Rally. This officially licensed rally button box was designed by Fanatec in collaboration with the M-Sport WRC team and was used in the 2022 and 2023 Ford Puma Hybrid Rally WRC car. Pokornyi Engineering has created its own version based on this rally button box that you can build yourself with the Pokornyi Engineering Rally Button Box DIY Kit.
You might think you can only use the PE Rally Button Box for rally, but actually this button box is also perfect for rally cross, GT racing and even cup racing. That's what makes it so versatile and ideal for different purposes!


This amazing carbon front panel has a super-strong build quality with an elegant front plate made of 4mm thick carbon fibre. It not only looks great, but also offers ultimate control and flexibility. You can customise the RGB-lit buttons and dials however you want via SimHub. Featuring two cool Funky (7-way) switches and three push-function rotary knobs. It supports dual clutch, although the design itself is not included. And best of all, it's easy to install on your existing setup with the 70mm PCD quick connectors. Game on!
Rally DIY Files
For only €28 (excl. VAT) you get the Rally DIY files of the Pokornyi Engineering Rally Button Box . What's included? Well, a super comprehensive manual of up to 43 pages with step-by-step instructions. You also get a complete BOM list with all the necessary parts and handy links to order them. But that's not all! You also receive the 3D print files (.stl) and the carbon fibre production files (.step). In short, you get the following:
- Sticker designs (printable .pdf and vector included)
- Firmware for the PCB (binary files only)
- Files for the production of carbon fibre components (.step)
- Full BOM (component list with links)
- Files for 3D printing (.stl)
- Ready to order production files for custom PCB
- Detailed step-by-step DIY manual (43 pages)
- Carbon fibre switch design with switch plate
Features
The Pokornyi Engineering Rally Button Box has the following features:
- 4 mm carbon fibre front panel
- Dimensions: 178 x 114 mm
- RGB button and backlit rotary knob (SimHub compatible)
- 2x 7 Way Funky switch
- 3x rotary knobs with pressure function
- Optional magnetic paddle shifters (design included but not covered in this article)
- Support for double clutch (design for clutch not included)
- Compatible with 70mm PCD quick couplings
Build The Pokornyi Engineering Rally Button Box In X Steps
Are you new to the world of DIY sim racing projects? Then the Rally Button Box from Pokornyi Engineering is perfect to start with! Building this button box is super cute and easy, suitable for everyone. It is much simpler and straightforward than the HYP-R, the GTE Button Box or a homemade button box. So what are you waiting for? Get started and have a great racing experience!
Step 1: Preparation
Of course, the first step for this project is obvious. Before you start this project and build your own rally button box, it is important that you have the digital Rally DIY Files purchased. This comprehensive digital manual is available for, as previously mentioned, just €28 excluding VAT.
Once you have bought the DIY files, I recommend you read all the documents carefully so that you can start this project well prepared. Read and review the supplied BOM list and order all the parts you need. This excel list is clearly laid out and categorised per component: electronics, hardware parts, carbon, 3D printing, stickers and others. An example of what to expect can be found below.

On Pokornyi Engineering's website, you can buy some parts so that you don't have to assemble them yourself. This saves time and effort. If you are a die-hard DIYer, you can always go for the more advanced option by, for example, making the PCB yourself. The following parts are for sale:
- Rally Stickers for € 12.00
- Rally PCB for € 79.00
- Carbon front panel for € 32.00
- Carbon Shifters (optional) for €49.00 (via The French Sim Racer)
Planning and Research
Read the manual thoroughly before you start building. When buying parts, such as via AliExpress for example, you should expect longer shipping times. Carefully check all ordered parts and tick them off in the BOM list. A tip: you can never have enough screws and bolts, as you will lose them quickly. Therefore, always have a sufficient amount of extra stock to avoid frustrations during the construction process. After all, nothing is more annoying if it turns out during construction that you have too few parts.
Do you have your own 3D printer and plan to print all the parts yourself? Or do you prefer to outsource this? The guide lists some options of recommended 3D printing services. It is good to research and weigh up which is the best choice for you.
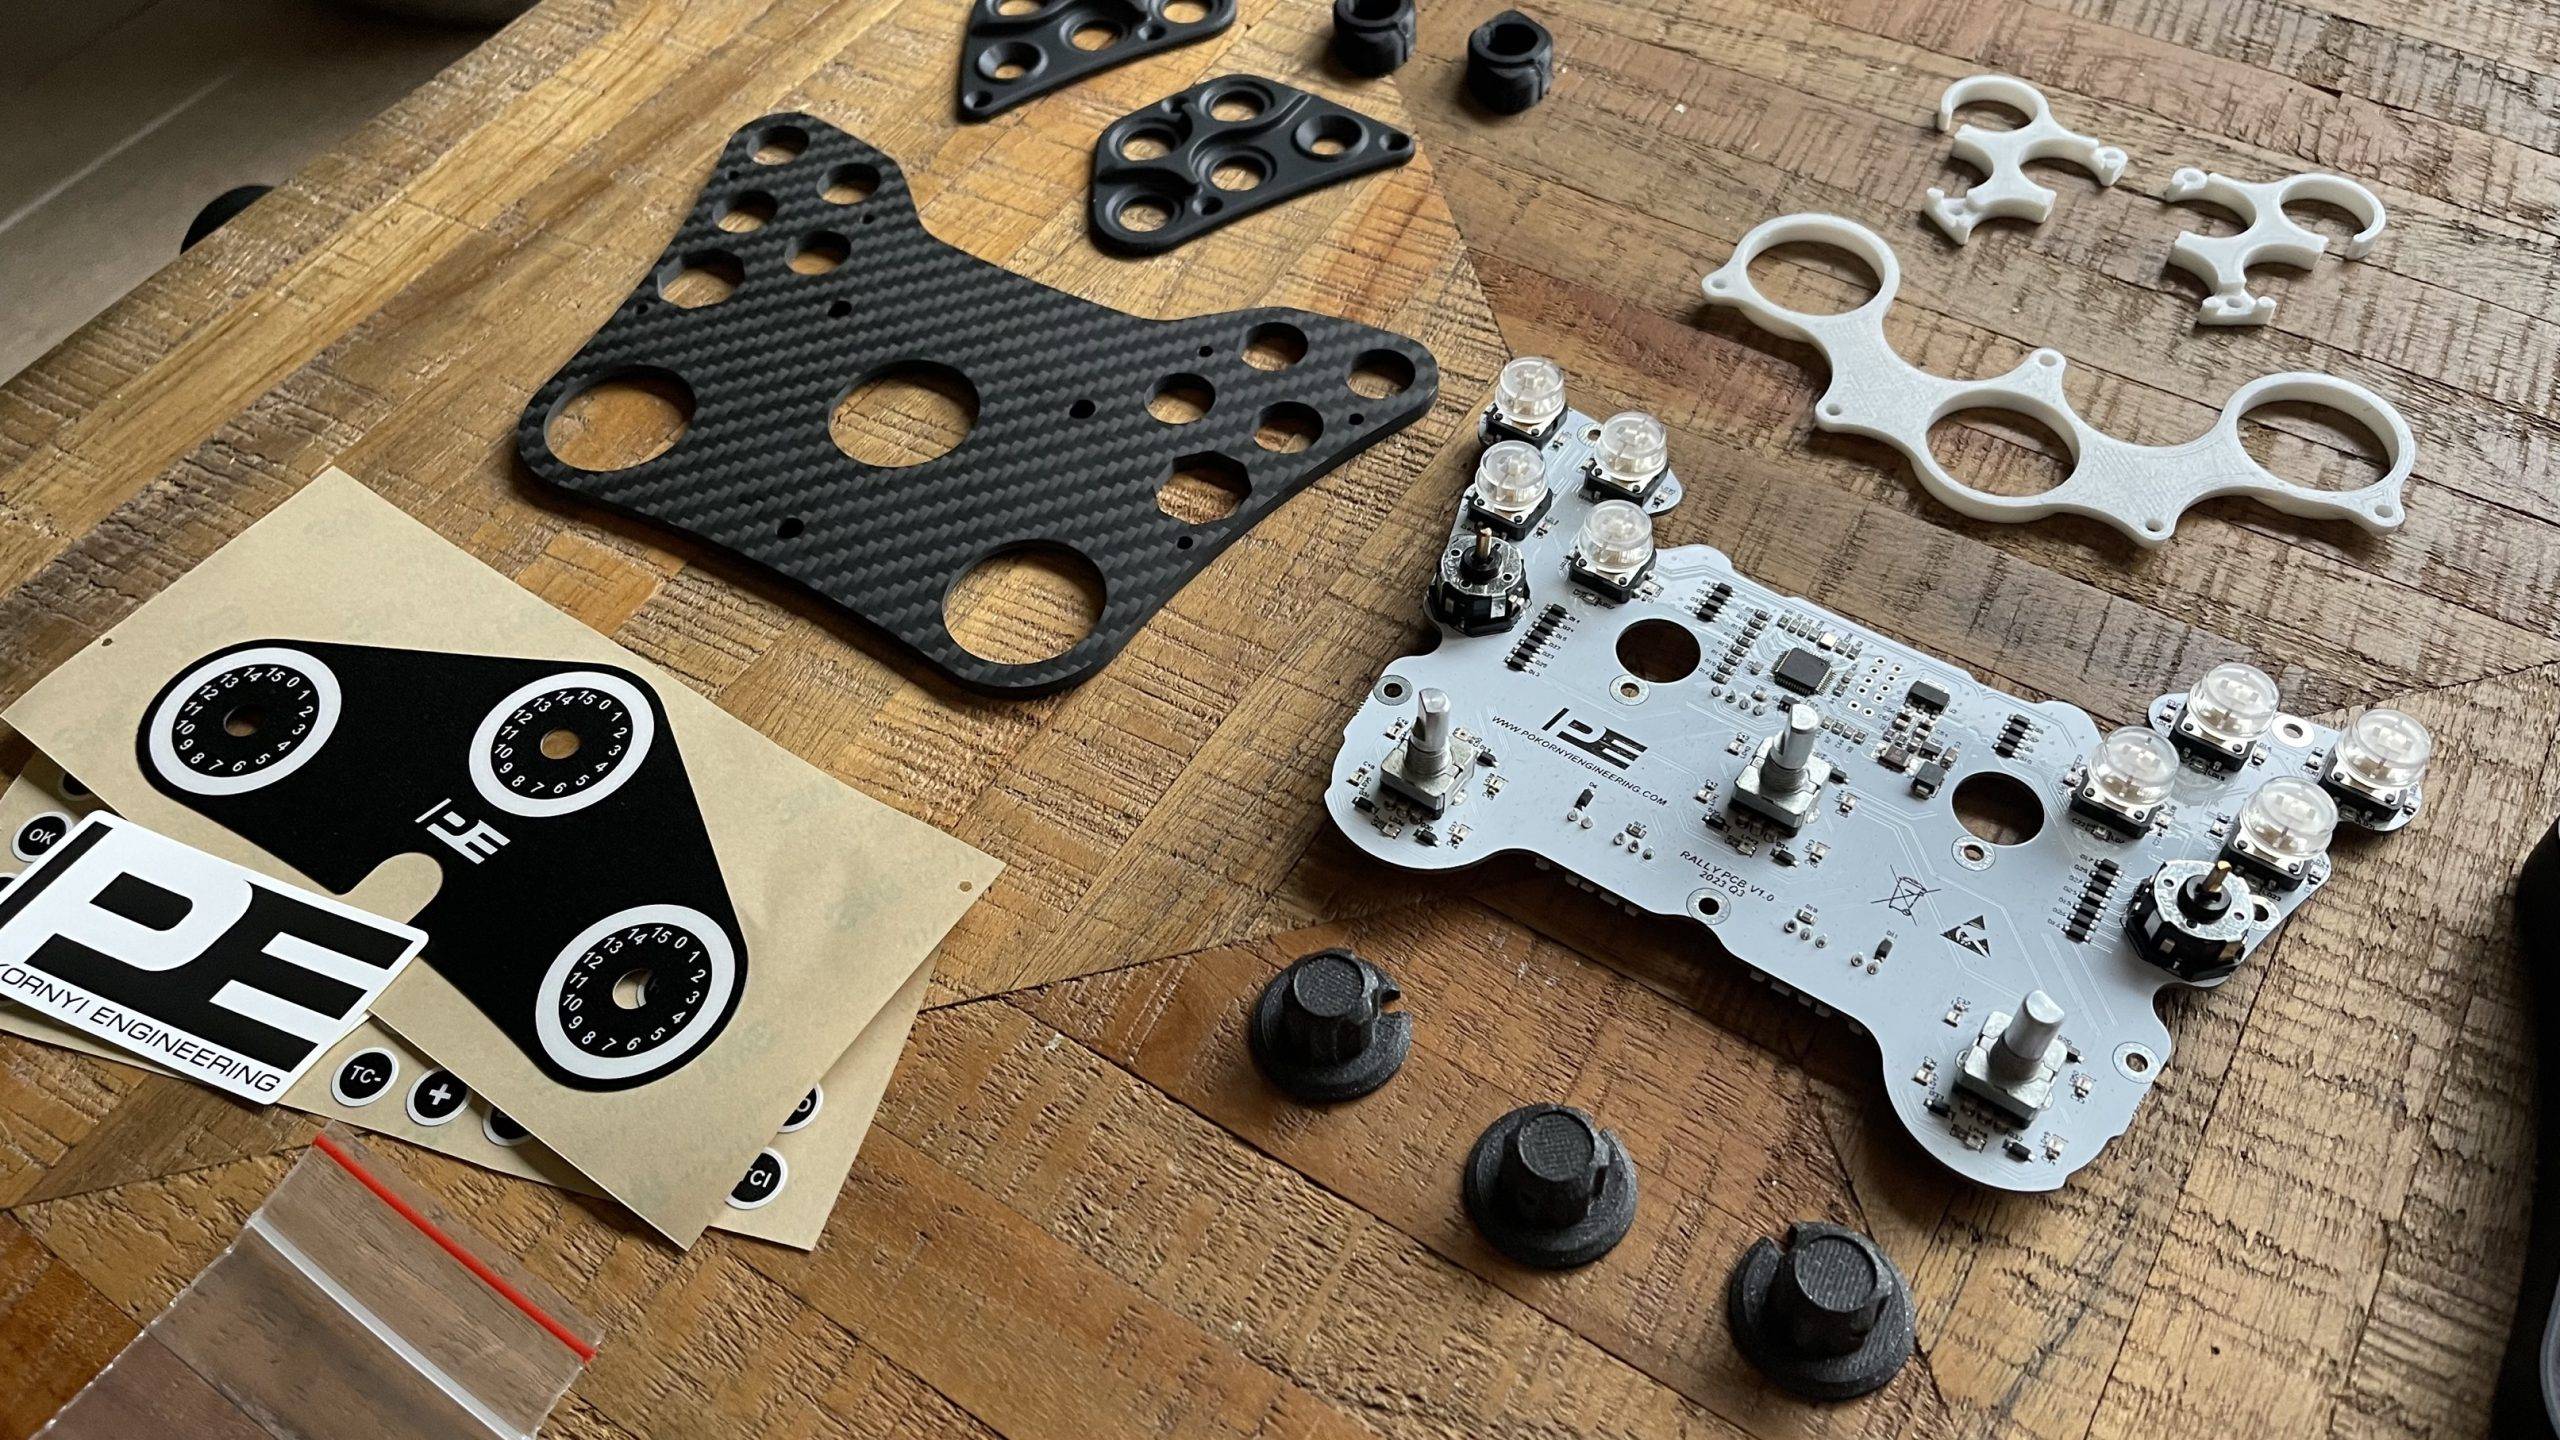
Step 2: Gather All Parts And Tools
Before we start building, it is advisable to collect all the parts. Double-check against the manual that you have all the parts. This ensures that you don't waste time during the building process by having to search for missing parts. Collecting all parts also promotes efficiency and accuracy in the building process, as you have everything at hand. It also minimises the chances of mistakes and reduces the frustration that can arise when parts are missing during construction. In short, gathering all parts is an important step to ensure a smooth and successful construction process.


Required Tools
For this DIY project, we will need the following tools:
- A soldering iron
- Allen screws
Step 3: Assembling the casing
OK, now that we have collected all the parts, it is time to start assembling the rally button box. As a first step, we are going to insert the fifteen M3x6mm threaded tubes into the holes of the body, to which we will later mount and screw the PCB, among other things. Using a soldering iron, easily push the threaded inserts into the holes of the body. Take care not to overheat the soldering iron. Too high a temperature can melt the plastic too much, causing the threaded tubes to no longer be tight enough or to sit incorrectly. So start with a slightly lower temperature!
Second, we will attach the GX12 connector. Push the nut of the GX12 connector into the socket. Then tighten the GX12 connector to the part. It is now recommended to solder the JST cable to the connector. There is a clear diagram in the detailed manual explaining which cables to solder where. This doesn't take much to do. The housing is now ready, time for the next step!

Step 4: Mounting the PCB
Take out the PCB (Printed Circuit Board) and carefully insert it into the enclosure. Don't forget to connect the JST connector of the GX12 connector. Next, mount the white light guides for the rotarty buttons to the PCB with the 9 M3x8mm Allen screws. Next, snap the transparent button caps onto the 8 omron buttons. If all goes well, your rally button box now looks like this 😉


Step 5: Assembling and attaching the front panel
The heart of the Pokornyi Engineering Rally Button Box is now officially ready! It is now time to assemble the front panel. Insert the round transparent inserts into the notches on the front of the carbon fibre panel. Then stick the sticker on the front of the panel and attach the front panel to the case. Now attach the printed button plates to the top at the 8 omon buttons and screw them in place with the screws.


The rally button box is now almost finished and all we need to do as a final step is to mount the rotary buttons and the two funky switches. Easy! Personalise your rally button box with the stickers and choose the function you want to use. Ever want to swap the stickers? No problem! You can easily snap off the transparent button caps and then place them in another one. We have now finished assembling the Pokornyi Engineering Rally Button Box. Time for the next and final step in this building process.
Step 6: Mounting On The Steering Wheel And Hardware Testing
Take your favourite rally, GT or Cup steering wheel and mount the button box with three M5 screws. The button box is compatible with almost all wheelbases. So without too much effort and in no time at all you can attach this button box to your favourite steering wheel.
Connect the button box to your PC and check that all inputs work. You do this by going to Control Panel > Devices and Printers go. Then right-click on the controller and go to Game Controller Settings. Select the PE Rally and click on Properties. Fortunately, little can go wrong, so chances are that all inputs will work properly! Final step: set the RGB LEDs via SimHub.
Step 7: Race But!
Congratulations! It's now time to get your favourite racing game start up and enjoy your own created rally button box. And say honestly. Didn't the end result turn out fantastically beautiful? In any case, I am super happy with this new addition to my sim racing setup!

Conclusion
As you can see, making the Pokornyi Engineer Rally Button Box is a super fun and easy DIY project. Are you new to the world of sim racing DIY projects and want to make your own button box relatively inexpensively? Then this project and the Pokornyi Engineering Rally Button Box are just the thing for you! It is simple, low-threshold and also great fun. By building your own button box, you have - hopefully - gained new skills, let your creativity flow and gained the confidence to experiment, innovate and make something yourself. Again, I hope this fun DIY project has inspired you. It is actually fun to create and build something unique yourself instead of going for standard solutions. These kinds of projects, no matter how small or big they are, give a lot of satisfaction and fun. And that's what we do it for, right?
Do you now enjoy making your own sim racing DIY projects? Then check out our wide range of inspiring articles or take a look at the website of Pokornyi Engineering for more cool DIY projects.
Have any thoughts?
Share your reaction or leave a quick response — we’d love to hear what you think!
-
 0
0
-
0
-
0
-
0
-
0
-
0


